相信大家平时开发的过程中,都会使用到 API文档工具吧?大家都在使用什么呀?Java docs,I/O Docs, apiary.io, Docco, Dexy, Doxygen, TurnAPI,Swagger。今天我就来教大家如何使用 Swagger 搭建 API 文档,并且配置权限使用。毕竟开发文档还是内容使用的为好,万一上线到生产环境,没有关swagger 又没有设置权限,那可不GG啦。
好,我们这就上手搞起来。
我们将使用 Springfox 对 Swagger 2 规范的实现,并通过 JWT 的方式来设置权限。
配置SwaggerUI
第一步:向Spring Boot项目添加Maven依赖项
打开 pom.xml 文件,添加 springfox-boot-starter 到 maven 依赖中。
< dependency >
    < groupId >io.springfox< /groupId >
    < artifactId >springfox-boot-starter< /artifactId >
    < version >3.0.0< /version >
< /dependency >
添加 springfox-boot-starter 依赖后,spring boot 能启动配置功能,配置好 swagger,所以我们不需要手动添加注解来启用 Swagger。
我们启动一下项目访问 Swagger 文档的 JSON API , 来看看 Springfox 是否正常运行。我们可以在浏览器中输入以下URL:
http://localhost:8080/v3/api-docs
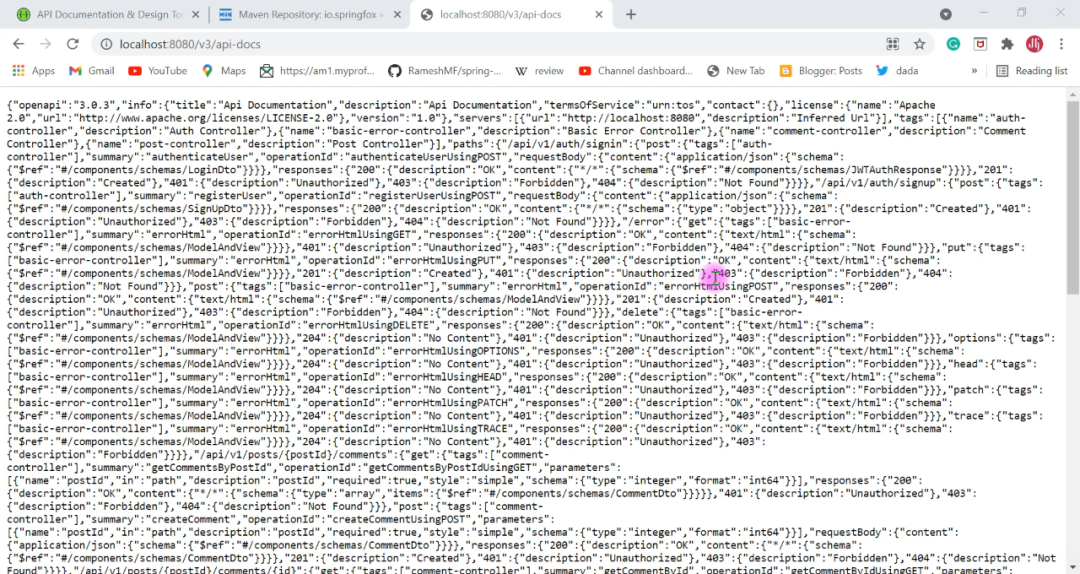
能够看到以上的类似结果,说明我们第一步已经成功了。
第二步:将 Swagger 2 集成到 Spring Boot 项目中去
我们创建一个 SwaggerConfig 类,并用 @Configuration 注解来注释。Swagger 的配置主要围绕着 Docket 对象来完成。我们可以在 SwaggerConfig 类中添加以下代码。
@Configuration
public class SwaggerConfiguration {
    private ApiInfo apiInfo() {
        return new ApiInfo("Blog REST APIs",
                "REST APIs for Blog Application",
                "1.0",
                "Terms of service",
                new Contact("xxx", "xxx", "xxx"),
                "License of API",
                "API license URL",
                Collections.emptyList());
    }
    @Bean
    public Docket api() {
        return new Docket(DocumentationType.SWAGGER_2)
                .apiInfo(apiInfo())
                .select()
                .apis(RequestHandlerSelectors.any())
                .paths(PathSelectors.any())
                .build();
    }
}
在构造 Docket 对象之后,它的 select() 方法返回了 ApiSelectorBuilder 的一个实例,它提供了一种控制 Swagger 所暴露的端点的方法。
我们可以通过使用 RequestHandlerSelectors 和 PathSelectors 配置选择 RequestHandlers 的路径。如果两者两者使用 any() , 那就说明配置所有的 API 都能在 Swagger 上显示了。
第三步:访问 Swagger UI
Swagger UI 是一个内置的解决方案,使用户与 Swagger 生成的API文档的交互变得更加容易。我们在浏览器中输入下面URL即可查看:
http://localhost:8080/swagger-ui/
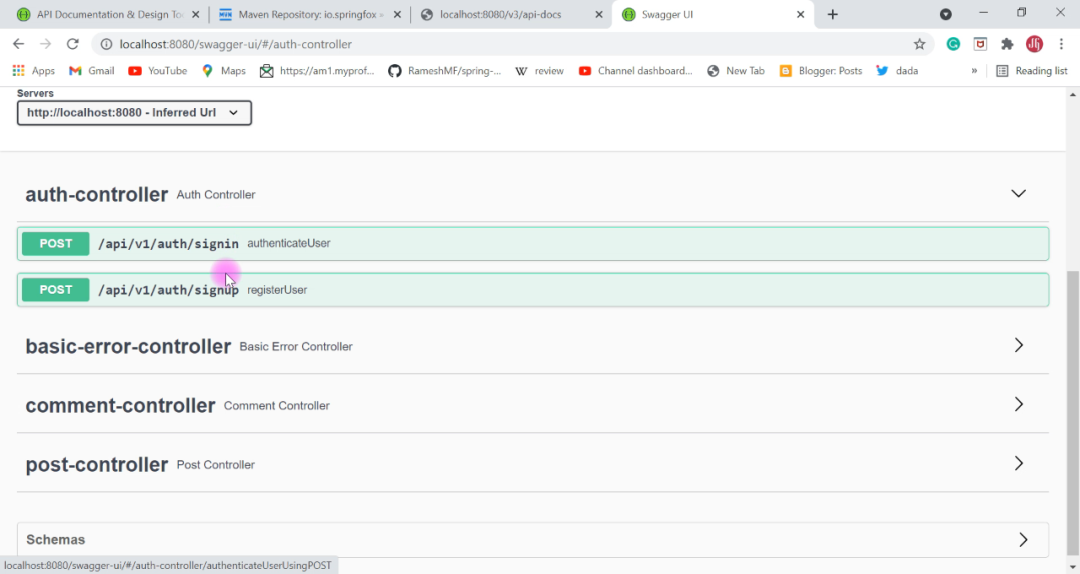
结果应该是这样的。
好,到这里 Swagger 的使用配置就算结束了。那接下来我们来看看怎么用JWT增加权限配置呢?
配置 JWT
JWT 是什么?相信大家都一定听过吧,它就是 JSON Web Token 的缩写。话不多说,直接上手代码配置起来。在 SwaggerConfig 里面新增代码。
我们先来配置 ApiKey 作为 JWT 的认证 header 信息:
public static final String AUTHORIZATION_HEADER = "Authorization";
    private ApiKey apiKey(){
        return new ApiKey("JWT", AUTHORIZATION_HEADER, "header");
    }
下一步,我们配置 JWT 的 SecurityContext , 对 SecurityContext 配置全局的 AuthorizationScope :
private SecurityContext securityContext(){
        return SecurityContext.builder().securityReferences(defaultAuth()).build();
    }
    private List< SecurityReference > defaultAuth(){
        AuthorizationScope authorizationScope = new AuthorizationScope("global", "accessEverything");
        AuthorizationScope[] authorizationScopes = new AuthorizationScope[1];
        authorizationScopes[0] = authorizationScope;
        return Arrays.asList(new SecurityReference("JWT", authorizationScopes));
    }
然后我们配置 Docket 对象,对 Docket 对象设置 SecurityContext ,SecuritySchemes。
@Bean
    public Docket api(){
        return new Docket(DocumentationType.SWAGGER_2)
                .apiInfo(apiInfo())
                .securityContexts(Arrays.asList(securityContext()))
                .securitySchemes(Arrays.asList(apiKey()))
                .select()
                .apis(RequestHandlerSelectors.any())
                .paths(PathSelectors.any())
                .build();
    }
到这里,JWT 就配置完成了,感觉是不是挺简单的?好,我们再来运行一下,看看效果
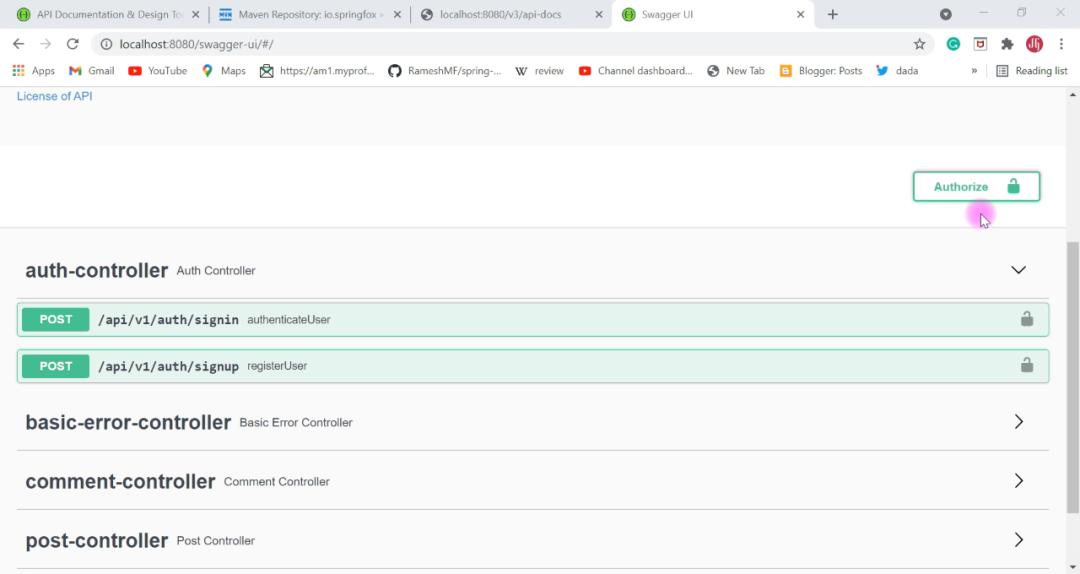
我们点击右上角的 Authorize 按钮,弹出一个输入 apiKey 的弹出层。
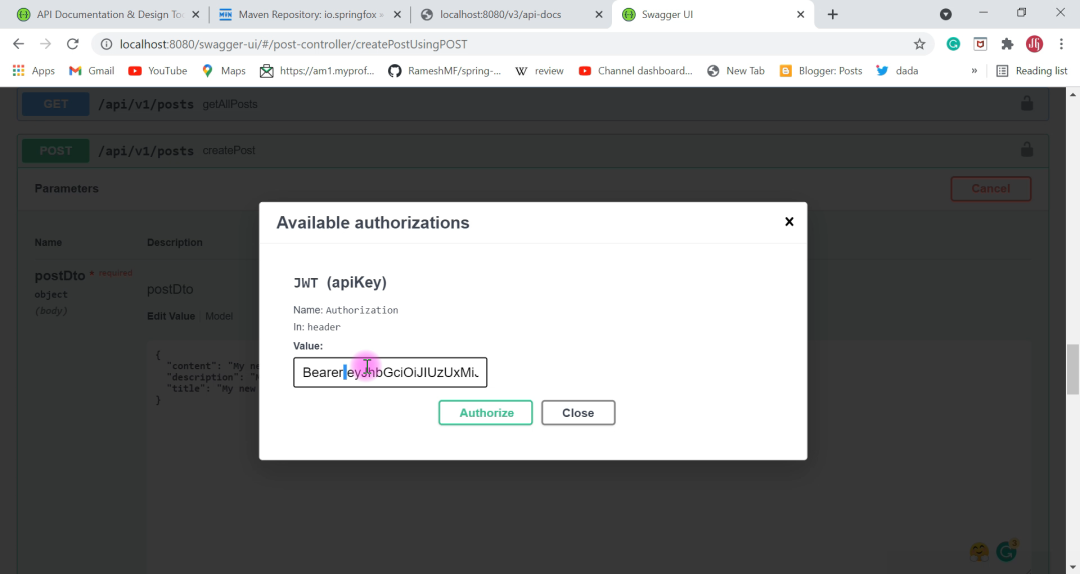
输入 api key 之后,点击 Authorize 认证通过,我们就又能调用 API 接口调试了。
用注解定制 Swagger API 文档
为了能够定制 Swagger 文档,swagger-core 提供了一套注解来声明和操作输出。
Swagger-core 注解:
| Name | Description |
|---|---|
| @Api | 标记为 Swagger 资源 |
| @ApiModel | 标记为 Swagger 模型 |
| @ApiModelProperty | 模型字段的属性说明 |
| @ApiOperation | http接口的说明 |
| @ApiParam | http 接口参数说明 |
更多详细的说明可以参考 GitHub 上的解释:https://github.com/swagger-api/swagger-core/wiki/annotations
现在我们就举个例子来解释怎么使用这些个注解, 首先来看 @Api 和 @ApiOperation 怎么使用:
@Api(value = "CRUD Rest APIs for Post resources")
@RestController
@RequestMapping()
public class PostController {
    @ApiOperation(value = "Get All Posts REST API")
    @GetMapping("/api/v1/posts")
    public PostResponse getAllPosts(
            @RequestParam(value = "pageNo", defaultValue = "0", required = false) int pageNo,
            @RequestParam(value = "pageSize", defaultValue = "100", required = false) int pageSize
    ){
        ...
    }

}
再来看看 @ApiModel 和 @ApiModelProperty 怎么使用:
@ApiModel(description = "Post model information")
@Data
public class PostDto {
    @ApiModelProperty(value = "Blog post id")
    private long id;
}
是不是感觉 so easy?
总结
通过这篇文章我们学习了如何通过 Springfox 来搭建 Swagger API 文档平台,然后也学会了如何设置 JWT 的方式做认证,保证 API 不会被别人能够恶意使用。
-
API
+关注
关注
2文章
1499浏览量
61955 -
浏览器
+关注
关注
1文章
1022浏览量
35325 -
URL
+关注
关注
0文章
139浏览量
15328 -
代码
+关注
关注
30文章
4779浏览量
68518
发布评论请先 登录
相关推荐
鸿蒙开发接口公共事件与通知:【FFI能力】 N-API在Android、iOS平台应用的使用指导
Tasking平台搭建流程
缺少VGlite字体渲染api文档,求分享
如何搭建API程序_框架api接口规范

windows+apach+oracle+php环境搭建文档


 如何搭建 Swagger API文档平台


评论